What you need:
- A glue gun, preferably with a variable heat setting.
- Chopsticks. (15″ cooking chopsticks are best, but not necessary.)
- Acrylic paint and brushes.
- Spray laquer.
- Patience.
While the process is simple, the devil is in the details. Wands are supposed to be unique and elegant tools that last a lifetime. For a kid (or anyone) to appreciate them, they must have a certain amount of gravitas and, most importantly be one-of-a-kind – even if the differences are minor.
When you start making your wand, tell yourself a story. Where did it come from? What kind of wizard used it? Was is taken from a bog root and so it’s covered with pocks and insect bores? Or was it made in a laboratory and only has fine, clean lines for the discerning enchanter?
These thoughts will show in the final product.
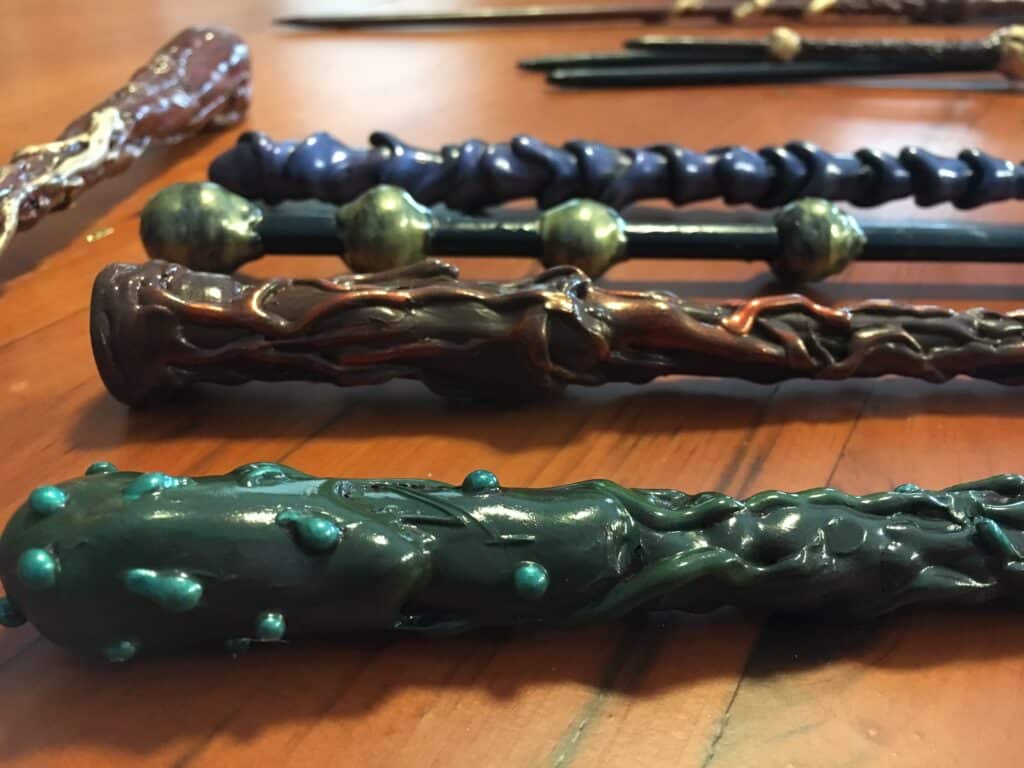
- Using your glue gun, slowly layer glue along the entire length of the chopstick. In order to make the wand feel like a single, solid piece try not to leave any of the chopstick exposed.
- When the chopstick is covered, you can continue on to detail work. You can make “orbs” on the wand by using a large amount of glue and then slowly spinning the wand as the glue dries. Try forming “veins” along the length by setting your temperature to low and drawing branching roots down the shaft. Have fun and use your imagination!
- When you’ve completed the body, it’s time to paint. First paint an undercoat of any color, but one which will compliment the topcoat. (Brown, green or black are safe bets.)
- The topcoat can be any color, but let’s shoot for wood. Wood has a lot of natural variation, so mix some darker or lighter colors, but not too thoroughly! You want the striations in the paint.
- Add the bits of detail that really make the whole thing shine. Highlight the roots and nodules that the glue naturally formed with gold, silver, or any color accent.
- Finally, to preserve your work, you need to seal the wand. Using spray laquer (or similar), coat the wand evenly and all around. Please do this outside to avoid fumes!


